Introduction
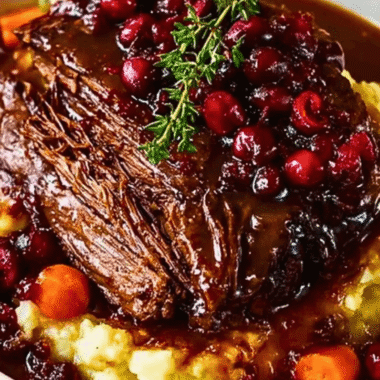
As the leaves begin to turn and a crispness fills the air, there's nothing quite like the warm, inviting aroma of Apple Cider Braised Pork Shoulder wafting from your kitchen. This dish beautifully melds the rich flavors of tender pork with the sweet tanginess of apple cider, creating a comforting meal perfect for fall gatherings or weeknight dinners.
The slow braising process transforms the pork into a melt-in-your-mouth wonder, infused with aromatic spices and the essence of the season. The marriage of savory and sweet makes it an ideal centerpiece for a hearty dinner table, inviting everyone to gather and share in the joy of good food.
Ingredients
- 4 pounds pork shoulder
The star of this dish, pork shoulder, is known for its rich flavor and well-marbled fat, which keeps the meat tender and juicy during the slow cooking process. This cut becomes fork-tender and absorbs all the flavor from the braising liquid. - 2 cups apple cider
Apple cider adds a delightful sweetness and depth to the dish. The acidity in the cider helps break down the pork shoulder, ensuring that it becomes incredibly tender while also adding a beautiful contrast of flavor. - 1 onion, sliced
Onions contribute a savory base to the braising liquid. As they cook down, they release their natural sugars and sweetness, enriching the overall flavor profile of the dish. - 3 cloves garlic, minced
Garlic lends a punch of flavor and aroma that elevates the dish. It balances the sweetness of the cider and enhances the savory notes of the pork for a well-rounded taste. - 2 sprigs fresh thyme
Fresh thyme adds an earthy, herbal note that complements the sweetness of the cider. This herb also enhances the overall richness of the meat as it cooks. - 1 teaspoon ground cinnamon
Cinnamon introduces warmth and a hint of spice that work beautifully with the apple cider. This aromatic spice helps evoke the essence of fall while contributing to a complex flavor profile. - Salt and pepper to taste
Seasoning the dish with salt and pepper is crucial for enhancing the natural flavors of the pork and other ingredients, creating a balanced and satisfying meal.
Directions & Preparation
Step 1: Preheat your oven to 300°F (150°C).
Preheating the oven ensures that the cooking temperature is consistent from the start, which is crucial for even cooking. By starting with a warm oven, you set the stage for the pork to slowly braise, resulting in a tender and flavorful dish.
Step 2: Season the pork shoulder generously with salt and pepper.
Seasoning the pork shoulder is key to infusing it with flavor right from the start. This encourages the meat to develop a savory crust as it browns, which adds depth to the overall dish while enhancing the taste with every bite.
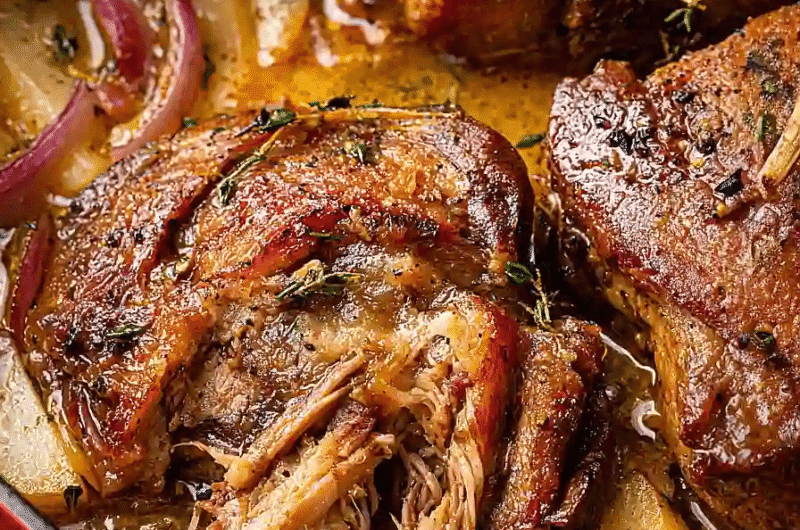
Step 3: In a large Dutch oven, sear the pork shoulder over medium-high heat until browned on all sides.
Searing the pork shoulder helps to lock in juices and creates a flavorful crust. This Maillard reaction caramelizes the meat’s surface, contributing to the dish's overall foundation of flavor that will deepen during the braising process.
Step 4: Remove the pork shoulder and set aside. In the same pot, add sliced onion and cook until softened.
Cooking the onions in the residual fat allows them to pick up all the flavorful bits sticking to the bottom of the pot. The result is a richer, more complex flavor base that will enhance the entire dish.
Step 5: Add minced garlic and cook for an additional minute until fragrant.
Garlic cooks quickly, and adding it after the onions ensures that it doesn’t burn. The aromatic oils released during this step enhance the overall flavor profile and prepare the base for the braising liquid.
Step 6: Return the pork shoulder to the pot, then add apple cider, thyme, and cinnamon.
This step combines all the ingredients, allowing the pork to benefit from the sweet and tangy apple cider while the herbs and spices infuse their flavors. It sets the stage for the slow braising that will transform the ingredients into a cohesive dish.
Step 7: Cover the pot and place it in the preheated oven.
Covering the pot is essential during braising, as it traps steam and moisture. This prevents the pork from drying out and helps to ensure that it becomes tender while absorbing all those wonderful flavors from the braising liquid.
Step 8: Braise the pork for about 4-5 hours until tender.
The long, slow cooking time allows the connective tissues in the pork shoulder to break down, resulting in succulent meat that falls apart with ease. This patience pays off, as the flavors meld together beautifully during this time.
Step 9: Remove the pot from the oven and let the pork rest before shredding.
Letting the pork rest allows the juices to redistribute, ensuring that every bite remains moist and flavorful. Shredding the meat after resting gives it a textural quality that works well with the sauce.
Step 10: Shred the pork and serve with the braising liquid.
Shredding the pork and serving it with the braising liquid not only enhances the flavor but also allows each bite to be infused with the rich, sweet-tart taste of the apple cider. This method is perfect for creating that comforting, hearty meal everyone will love.

The Importance of Searing
Searing the pork shoulder is a pivotal step in achieving a depth of flavor in your final dish. By browning the meat first, you're creating a crust that locks in the juices and adds a complex flavor that cannot be replicated in the braising phase alone. This initial caramelization is the flavor foundation of your Apple Cider Braised Pork Shoulder.
Perfectly Paired Sides
When serving your hearty Apple Cider Braised Pork Shoulder, consider pairing it with roasted vegetables or creamy mashed potatoes. These sides complement the dish's rich flavors without overwhelming them, offering balance. A crisp green salad or homemade apple sauce can provide a refreshing contrast that's perfect for the fall season.
Leftover Bliss
Leftover Apple Cider Braised Pork Shoulder is a delightful treat for lunch or dinner. The flavors continue to meld, making it even tastier the next day. Use it for tacos, sandwiches, or salads to elevate simple meals. The versatility of this dish ensures there's no waste, just unforgettable meals with each leftover opportunity.
FAQs
Why did my sauce come out too thin?
If your sauce is too thin, try simmering it uncovered on the stove for a few minutes to reduce the liquid and concentrate flavors. Adding a cornstarch slurry may also help thicken it if preferred.
What can I do if the pork shoulder is overcooked?
If the pork is overcooked, it might become dry. To salvage it, shred the meat and mix it with some of the braising liquid to reintroduce moisture. This can help revive the dish's juiciness.
Can I use a different cut of pork?
Yes, while pork shoulder is ideal for braising, you can also use pork butt or even pork loin. However, keep in mind that different cuts will yield varying textures and flavors, with leaner cuts cooking faster.
What if I have an issue with the balance of flavors?
If the dish tastes bland or flat, consider adjusting the seasoning with additional salt, pepper, or a splash more cider. Balancing sweetness with a bit of acidity, such as a drizzle of vinegar, can also enhance flavors.
How can I incorporate more vegetables into this dish?
You can add root vegetables like carrots or parsnips during the braising process. They will absorb flavors and add nutrition, also contributing delightful texture and sweetness.
Can I add spices to change the flavor profile?
Absolutely! Feel free to experiment by adding spices like smoked paprika or allspice for a unique twist. Just remember to adjust according to your preference and to taste as you go.
Conclusion
Preparing Apple Cider Braised Pork Shoulder is more than just cooking; it’s about creating a warm, welcoming experience for you and your loved ones. With each bite of tender pork, you're embracing the spirit of the season, along with the communal joy that comes from sharing a homemade meal.
So gather your ingredients, take your time with the cooking process, and enjoy the natural flavors that emerge. This dish not only celebrates the essence of fall but also transforms your kitchen into a cozy haven filled with delicious aromas and heartwarming memories.
Recipe Card
Notes
Additional serving suggestions: pair with a crisp salad, garlic bread, or roasted seasonal vegetables for balance.
For make-ahead, prep components separately and assemble just before heating to preserve texture.
Taste and adjust with acid (lemon/vinegar) and salt right at the end to wake up flavors.